How Can Custom Automotive Displays Reach PVT Faster?
A custom automotive display can move from an original technical specification to EVT, DVT, PVT, and golden-sample approval in 4–6 weeks only when engineering, sourcing, tooling, validation, and quality planning run in parallel. The…
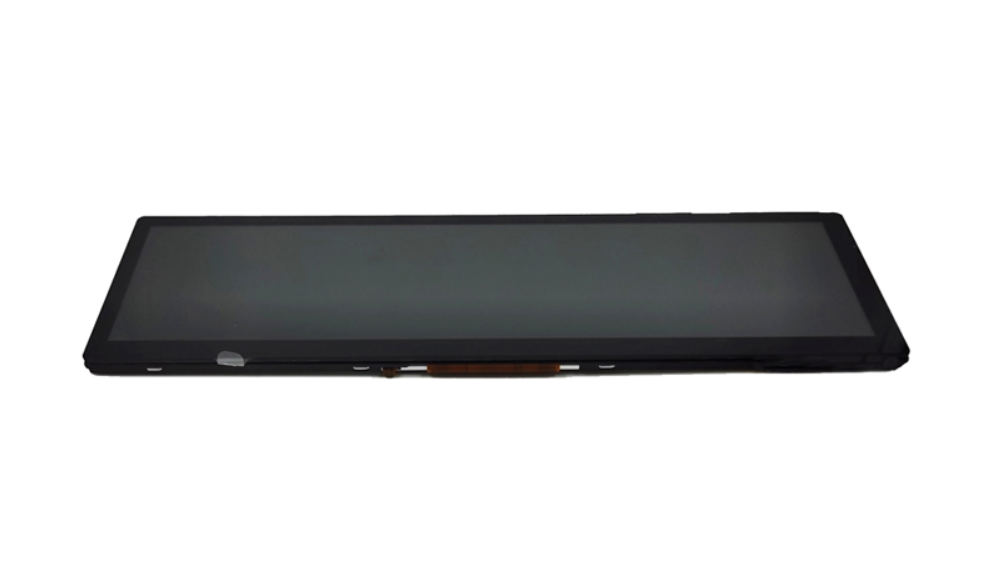
A custom automotive display can move from an original technical specification to EVT, DVT, PVT, and golden-sample approval in 4–6 weeks only when engineering, sourcing, tooling, validation, and quality planning run in parallel. The critical control points are a frozen requirements matrix, release-ready CAD drawings, risk-based validation, controlled pilot production, and documented approval criteria.
What Do the Top-Ranking EVT, DVT, and PVT Articles Cover?
The most common topics in leading EVT, DVT, and PVT guidance are engineering feasibility, complete-design verification, manufacturing repeatability, prototype quantities, production tooling, validation testing, and mass-production release. Most articles correctly define the stages, but they rarely explain the display-specific timing traps that cause automotive programs to miss launch dates.
The repeated themes can be converted into five common project questions:
- What does EVT validate in a hardware development program?
- How does DVT prove that the final design meets its requirements?
- What does PVT confirm before mass production starts?
- When should drawings, materials, and manufacturing processes be frozen?
- How are golden samples approved before production release?
For a custom vehicle display, three additional questions matter just as much:
- How can LCD, touch, backlight, mechanical, and electronics workstreams run in parallel?
- Which display-specific risks must be closed before design freeze?
- Who owns a quality-gate decision when a sample passes functionally but fails automotive robustness margins?
What Does EVT Validate for a Custom Vehicle Display?
EVT confirms whether the display architecture can meet the original specification: optical performance, electrical behavior, mechanical fit, touch response, thermal feasibility, and key interface functions. It is not a cosmetic sample stage. EVT should expose the failures that are cheapest to correct before tooling, validation, and pilot-line investment.
At CDTech, the EVT entry point begins with a requirement-to-design traceability matrix. A customer technical specification often includes terms such as “high brightness,” “automotive grade,” or “wide temperature,” but these terms are not engineering limits until converted into measurable targets.
For example, “high brightness” needs to become a defined luminance target, such as 800, 1,000, or 1,200 cd/m², measured under an agreed condition. “Wide temperature” needs operating and storage limits, dwell time, ramp rate, and whether the unit must boot at the low-temperature boundary. “Automotive display” needs a defined use case: center information display, instrument cluster, rear-seat entertainment, mirror display, charging interface, or off-highway equipment HMI.
A typical EVT sample may include 3–10 units, depending on the complexity of the display stack. These units are used to prove that the selected TFT panel, LED backlight, optical bonding method, cover lens, touch sensor, driver board, and housing can work as one system.
In our production runs, we have seen a 10.1-inch 1,000-nit display pass a bench brightness measurement but fail after bonding because the selected OCA thickness altered the air-gap behavior near the black matrix. The result was visible Newton-ring-like interference under angled sunlight. The electrical design was correct; the stack-up was not. That is exactly the kind of failure EVT should find.
EVT exit criteria should include:
- Basic image output at the target resolution and refresh rate
- Defined luminance and uniformity baseline
- Touch functionality across the active area
- Mechanical assembly fit with no interference
- Preliminary thermal and power measurement
- Interface validation for LVDS, eDP, MIPI, HDMI, or RGB
- Initial failure analysis for all critical defects
- Agreement on the next CAD revision and bill of materials direction
How Does CDTech Turn a Raw Spec Into Frozen CAD?
CDTech converts the raw requirement document into controlled mechanical, electrical, optical, and quality outputs before releasing a frozen CAD package. The fastest projects do not skip design review; they shorten the loop by running the design review simultaneously with component feasibility, supplier confirmation, and prototype preparation.
The practical starting point is a specification clarification meeting. The engineering team should identify every requirement that affects the display stack, including:
- Active area and outer dimensions
- Viewing direction and mounting orientation
- Resolution, brightness, contrast, and color targets
- Touch technology and glove or wet-touch requirements
- Cover lens thickness, printing area, and edge profile
- Operating temperature and thermal exposure
- Vibration, shock, humidity, and UV requirements
- Connector orientation, cable length, and pinout
- Electromagnetic compatibility constraints
- Cosmetic acceptance criteria
- Annual volume, pilot quantity, and target cost
The display CAD release should include more than an outline drawing. A release-ready package normally contains a 2D dimensional drawing, 3D model, tolerance stack-up, assembly section view, connector definition, mounting-hole datum strategy, optical stack description, approved material list, and revision-control record.
The fastest way to lose a week is to freeze external dimensions before checking the connector bend radius and rear-housing clearance. On compact automotive displays, a cable connector may require 8–15 mm of effective bend space behind the module. If the customer’s enclosure provides only 4–6 mm, the problem is not solved by “pushing” the cable in production. It becomes a mechanical redesign, a right-angle connector change, or a flex-routing revision.
Custom Display Timeline and Gate Plan
| Project window | Parallel activities | Gate output | Typical decision owner |
|---|---|---|---|
| Days 0–2 | Review raw specification, interface, use case, annual volume, quality requirements | Requirement traceability matrix and feasibility decision | Program manager, customer engineering |
| Days 2–5 | Mechanical stack-up, panel selection, optical proposal, touch review, DFM review | Preliminary CAD and risk register | Mechanical, optical, electrical engineers |
| Days 5–10 | CAD release, BOM lock for prototype, fixture concept, sample material preparation | EVT build package | Engineering and quality |
| Days 10–16 | EVT assembly, optical measurement, interface test, fit check, failure analysis | EVT report and correction list | Project quality lead |
| Days 16–27 | DVT build, reliability testing, tooling refinement, process-flow validation | DVT approval and design freeze | Customer and supplier quality |
| Days 27–42 | PVT pilot run, line audit, yield review, golden-sample comparison | PVT sign-off and mass-production release | Customer quality, manufacturing, CDTech |
A 4–6-week program is realistic only when the product uses an available TFT platform and does not require a brand-new LCD cell, new injection-mold tool with complex undercuts, or extensive vehicle-level certification. For a fully new panel design, the calendar is substantially longer because cell engineering, mask work, liquid-crystal tuning, and panel qualification cannot be compressed safely.
Which Display Risks Must Be Closed Before DVT?
Before DVT, the team must close risks involving optics, bonding, thermal performance, mechanical tolerance, touch behavior, electronic interface stability, and manufacturability. DVT is not the time to discover that the display works only in a laboratory fixture or that the cover lens cannot be assembled consistently without cosmetic defects.
The most expensive display failures are usually interaction failures between individually acceptable parts.
A TFT panel can meet its brightness specification. A cover lens can meet its cosmetic specification. An OCA can meet its adhesion specification. Yet the combined display can still fail due to haze, bubble growth, edge lift, reflected ambient light, color shift, or visible mura.
For automotive and outdoor HMI displays, the key checks before DVT include:
- Brightness and thermal margin: A 1,000-nit display may draw 6–12 W depending on size, LED efficiency, and optical stack. At high ambient temperature, the backlight thermal path must protect LED lifetime without driving the rear housing beyond the customer limit.
- Optical bonding choice: OCA bonding improves readability and reduces internal reflection, but requires clean-room handling, controlled lamination pressure, and careful lens-flatness control. Frame bonding may reduce cost, but can create stronger reflections and fogging risk in temperature cycling.
- Black-screen appearance: A module can meet luminance specifications but still look poor when powered off. Cover-lens color, black ink opacity, polarizer tone, and air gap all influence perceived blackness.
- Touch sensitivity: Thick cover glass, anti-glare coatings, gloves, moisture, and EMI can reduce projected-capacitive touch performance. A 1.1 mm lens may work with one controller and fail with another if the sensor pitch, grounding scheme, or firmware threshold is not tuned.
- Mechanical tolerance: The active area must align to the cover-lens viewing window. In practice, a tight cosmetic border may require an alignment allowance of 0.2–0.4 mm per side, depending on assembly fixtures and lens geometry.
- Backlight uniformity: Edge-lit displays can show hot spots, dark corners, or light-guide leakage. The defect may only appear after a dark-room inspection with a low-gray image, not on a full-white screen.
- ESD and interface robustness: A display that works on a bench can flicker, reset, or show touch jumps when installed near noisy harnesses, switching power supplies, or vehicle communication modules.
DVT should use production-intent materials and production-intent process conditions whenever possible. If DVT samples are hand-built with a substitute adhesive, temporary cable, or manually adjusted fixture, the results cannot reliably predict PVT yield.
Why Does DVT Need More Than Functional Testing?
DVT must prove that the complete design meets its defined requirements across expected use and environmental conditions. Functional testing confirms that an image appears; design validation confirms that the display retains performance after heat, cold, humidity, vibration, shock, electrical stress, and repeated use.
A robust DVT plan is based on a risk register, not a generic test checklist. For example, a dashboard-mounted display has different risks from a cabin rear-seat display. A display mounted near a windshield experiences solar loading, while a display in a protected interior console may face more touch wear and cleaning-chemical exposure.
For a 7-inch to 12.3-inch automotive-grade display, DVT commonly includes:
- High- and low-temperature operation
- High- and low-temperature storage
- Temperature cycling and thermal shock
- High-temperature, high-humidity storage
- Vibration and mechanical shock
- ESD and electrical transient evaluation
- Display optical verification before and after stress
- Touch response and calibration verification
- Adhesion, peel, or edge-lift inspection for bonded assemblies
- Cosmetic inspection under defined illumination and viewing distance
In our experience, the hardest DVT discussion is often not whether a unit passes or fails, but whether the test condition represents the real risk. For example, if a bonded display shows a small edge bubble after thermal cycling, the team must determine whether it is isolated, stable, and outside the visible region—or whether it is the early signal of adhesive expansion, moisture ingress, or poor surface-energy control.
A controlled response requires failure analysis. The team should record the unit serial number, material lot, operator, fixture, lamination parameters, image evidence, test profile, and defect growth after additional dwell time. Replacing the sample without preserving this data only delays the same problem until PVT.
When Should a Custom Display Enter PVT?
A custom display should enter PVT only after the design is frozen, DVT exit criteria are accepted, critical tooling is validated, work instructions are released, inspection methods are repeatable, and the pilot line can build the product using production-intent materials. PVT validates the manufacturing system, not a new design revision.
PVT is the bridge between an approved design and a stable factory process. The ideal PVT unit is commercially shippable if it passes final inspection. If engineers still need to manually rework connector placement, compensate for a poor fixture, or select the “best-looking” parts by eye, the product is not ready for PVT release.
A PVT run may range from dozens to hundreds of units, depending on program risk and expected production volume. For a low-volume industrial or specialty vehicle display, 30–100 units may provide adequate process evidence. For a higher-volume automotive program, the pilot should be large enough to expose material-lot variation, operator variation, station-to-station differences, and real yield behavior.
CDTech uses PVT to verify the production flow from incoming inspection through assembly, aging, final test, cosmetic inspection, packing, and shipment release. The key question is not merely “Did we build units?” It is “Can this exact process build conforming units repeatedly at the required yield and cycle time?”
A practical PVT dashboard should track:
- First-pass yield by process station
- Rework rate and rework reason
- Defect pareto by material lot
- Test-station repeatability
- Optical measurement distribution
- Assembly cycle time
- Critical-process parameter records
- Final cosmetic rejection rate
- Packaging drop or transit-risk findings
For example, a 96% PVT yield can be unacceptable if the missing 4% comes from random bonding bubbles that cannot be predicted or screened early. Conversely, a 96% yield caused by a known, fixable fixture-alignment issue may be acceptable for conditional release once corrective action proves effectiveness.
What Is Golden Sample Approval in Display Manufacturing?
Golden-sample approval is the formal agreement that a physical display unit represents the approved production standard for appearance, function, dimensions, materials, labels, test results, and packaging. It becomes the controlled reference used to judge later production units and resolve subjective quality disputes.
A golden sample should not be selected simply because it is the most attractive unit in the batch. It must be traceable to approved production materials, released process settings, documented inspection results, and a defined revision level.
For custom automotive displays, the golden-sample package should include:
- Approved sample unit with serial number
- Product drawing and BOM revision
- Cosmetic acceptance photos
- Luminance, uniformity, color, and contrast records
- Touch-function and interface test record
- Mechanical dimension report
- Reliability summary or DVT approval record
- Label and barcode reference
- Packaging specification and pack-out sample
- Deviation list, if any, signed by the authorized parties
The most useful golden samples include “boundary references” where appropriate. One sample may show the maximum acceptable minor cosmetic condition, while another represents the preferred cosmetic target. Without this distinction, inspectors can reject acceptable production units because they compare every unit to an unrealistically perfect sample.
CDTech recommends documenting the viewing conditions used for cosmetic approval: inspection distance, illumination level, viewing angle, display state, image pattern, and allowable defect zones. A scratch visible at 15 cm under high-intensity inspection lighting may not be visible at the approved 40 cm vehicle-use distance. The customer and supplier must agree on the rule before volume production, not during a shipment dispute.
How Can APQP and Parallel Engineering Compress Lead Time?
APQP and parallel engineering compress lead time by advancing quality planning, manufacturing preparation, supplier confirmation, and validation design before each prototype stage is complete. The objective is not to remove gates; it is to prevent idle waiting between gates while keeping every design change traceable and controlled.
For custom LCD display programs, the slowest activities are often not the visible ones. A CAD file may be completed in two days, while the real critical path is a special cover lens, touch sensor, FPC revision, custom backlight, or bonding material confirmation.
The best acceleration method is to identify long-lead and high-risk items on day one. If a custom glass lens needs silk-screen printing, chemical strengthening, anti-glare coating, and edge polishing, its process path must begin while the final mechanical drawing is being reviewed. The team can reserve material and validate feasibility under controlled assumptions, then release the final artwork after the design freeze.
Parallel engineering also requires disciplined change control. It does not mean that every department starts building from a different drawing revision. One project leader must maintain a single source of truth for:
- Requirement version
- CAD and drawing revision
- BOM revision
- Test specification
- Deviation approval
- Material substitution status
- Golden-sample revision
- Customer sign-off status
CDTech can reduce the first-sample cycle by running optical stack review, mechanical DFM, driver-board adaptation, and process-fixture planning concurrently. However, this model works only if the customer provides fast decisions on open points such as connector location, cover-lens artwork, logo color, brightness target, and cosmetic criteria.
Who Should Approve Each Quality Gate?
Each quality gate should be approved by the function that owns the relevant risk: engineering for feasibility, quality for verification evidence, manufacturing for process capability, and the customer for requirement acceptance. A program manager coordinates the decision but should not independently overrule unresolved technical or quality findings.
A clear approval map prevents a common project failure: a sample is declared “approved” by email even though no one has confirmed whether the approval covers function, appearance, reliability, packaging, or mass production.
A practical ownership model is:
- EVT approval: Product engineering, mechanical engineering, electrical engineering, optical engineering, and customer technical contact
- DVT approval: Supplier quality, customer quality, design owner, test owner, and program manager
- PVT approval: Manufacturing engineering, production quality, supplier quality, customer quality, and purchasing or program ownership
- Golden-sample approval: Customer quality representative and CDTech quality representative, supported by engineering and manufacturing records
The customer should also define escalation rules before the first build. For instance, a display with 980 cd/m² measured brightness against a 1,000 cd/m² nominal requirement may be acceptable if the agreed lower limit is 900 cd/m². It is not acceptable if 1,000 cd/m² is a minimum contractual limit. These are different specifications, and the decision cannot be made after samples arrive.
CDTech Expert Views
“The fastest automotive-display projects are not the ones with the fewest tests. They are the ones that discover the right failure early. In one program, we found that a 0.3 mm tolerance change in the rear bracket shifted pressure into the LCD edge during vibration. The display passed static fit checks but developed corner mura after vibration exposure. We corrected the bracket datum, added a controlled compression limit, and repeated the build before PVT. That intervention added days in DVT but prevented a field-return risk that could have lasted for years. At CDTech, we treat every prototype as production data, not as a presentation sample.”
Can a 4–6 Week Display Prototype Schedule Be Achieved?
A 4–6-week schedule can be achieved for a custom automotive display based on an existing panel platform, available materials, confirmed interface requirements, rapid customer feedback, and limited tooling complexity. It is not realistic for a ground-up LCD cell, a new complex housing tool, or an undefined specification requiring repeated redesign.
The practical requirements for a fast program are:
- An available TFT LCD platform with confirmed supply
- A known interface and electrical architecture
- Customer-provided 3D data, mounting references, and connector requirements
- Cover-lens artwork finalized within the first week
- No open debate over brightness, operating temperature, or touch requirements
- Prototype materials available or pre-booked
- Rapid approval turnaround after EVT and DVT reports
- A single decision-maker for commercial and technical changes
The most common reason that a “4-week project” becomes an 8-week project is late clarification, not factory speed. A customer may initially request a 10.1-inch automotive display, then later add glove touch, a 1.8 mm chemically strengthened cover lens, 1,200-nit brightness, anti-reflection coating, and a revised connector orientation. Each change is reasonable, but together they create a new product definition.
The right approach is to separate must-have requirements from phase-two enhancements. Freeze the safety-, fit-, and interface-critical elements first. Add optional cosmetic or feature upgrades only when their impact on cost, lead time, tooling, and reliability is visible to all stakeholders.
What Are the Key Takeaways for Display Program Managers?
A successful EVT-to-PVT display program depends on disciplined requirements control, parallel engineering, display-specific risk validation, traceable quality gates, and a golden sample tied to real production conditions. Speed comes from earlier decisions and better evidence—not from bypassing validation.
For the strongest launch outcome:
- Convert every broad requirement into a measurable acceptance criterion before CAD release.
- Use EVT to expose architecture and stack-up failures, not to create presentation samples.
- Use DVT to validate the complete display under realistic environmental and mechanical conditions.
- Enter PVT only with frozen design data, qualified materials, released work instructions, and production-intent fixtures.
- Approve a traceable golden sample with defined cosmetic, optical, functional, and packaging criteria.
- Assign a named owner for every unresolved technical risk and gate decision.
- Engage CDTech early when lead time depends on display-stack choices, bonding, touch integration, mechanical packaging, or automotive quality documentation.
What Are Common Questions About Display EVT, DVT, and PVT?
What is the difference between EVT, DVT, and PVT?
EVT proves that the display concept and key technologies work. DVT proves that the complete frozen design meets defined functional, optical, mechanical, and reliability requirements. PVT proves that the factory can repeatedly build the approved design using controlled production processes.
How many samples are needed for custom display EVT and DVT?
EVT commonly uses 3–10 samples for feasibility and early engineering learning. DVT often requires 10–30 or more units to support reliability testing, design verification, and failure analysis. The correct quantity depends on test coverage, display complexity, and whether destructive tests are required.
What makes a display golden sample different from an ordinary sample?
A golden sample is a formally approved, traceable reference built from approved materials and processes. It includes defined visual, functional, dimensional, and packaging standards. An ordinary sample may demonstrate a concept, but it does not necessarily represent the production baseline.
Can a custom automotive display go directly from EVT to mass production?
It should not. Skipping DVT and PVT leaves critical risks unproven, including reliability, process repeatability, fixture performance, operator variation, material-lot variation, and final inspection consistency. This often transfers cost and risk from development into production or field service.
When should the customer approve the final CAD drawing?
The customer should approve the final CAD drawing before DVT production-intent materials, tooling, and validation samples are committed. Late drawing changes can affect lens artwork, FPC routing, mounting fixtures, bonding alignment, housing clearance, and golden-sample validity.