Measuring Brightness, Contrast and Uniformity on Display Modules
Most disagreements about display brightness are not disagreements about physics. They are disagreements about conditions. Two laboratories can measure the same module and report numbers that differ by 30 per cent, both honestly, because…
Most disagreements about display brightness are not disagreements about physics. They are disagreements about conditions. Two laboratories can measure the same module and report numbers that differ by 30 per cent, both honestly, because they used different patterns, different warm-up times or different measurement distances.
The fix is not a better instrument. It is a written method that fixes the conditions, records them with every number, and is agreed between supplier and customer before the first sample is measured.
What each metric really measures
Brightness is luminance measured on a defined area, in a defined direction, with the display showing a defined pattern. Change any of those three and the number changes. A “peak brightness” figure is usually measured on a white area at the centre; a “full-screen white” figure measures the same panel with the whole screen driven, which loads the backlight and the driving circuit differently, and typically produces a lower value.
Contrast ratio is the ratio between a bright state and a dark state. In a dark room it reflects the panel’s own capability. In a lit room it reflects the panel plus its surface treatment, because reflected ambient light lifts the dark state. Both are legitimate measurements; they answer different questions.
Uniformity describes how much the values vary across the panel. It is normally expressed as a ratio or a percentage against the centre or against the maximum, and it is meaningless without saying which reference and which sampling points were used.
Geometry, distance and instrument placement
Measure on the display’s normal axis unless the purpose of the test is to characterise viewing behaviour. Position the instrument perpendicular to the panel surface, at the centre point of the area you are measuring, and keep the measurement distance consistent between sessions – a spotmeter’s reading depends on how much of the panel fills its field of view, and a change of distance changes the reading.
Block stray light from behind and beside the instrument. Even in a dark room, light from a doorway, a monitor or an indicator LED can enter the measurement path. If the instrument has a close-up lens or a hood, use it; if it does not, add a physical shield rather than relying on the room.
For uniformity and viewing-angle work, the same geometry has to be reproduced at every point or angle, which is why fixtures matter more than people expect. A hand-held reading taken from “about the same place” is not comparable with the previous session.
Warm-up and stabilisation before reading
Backlights drift. Luminance typically rises over the first minutes of operation and settles after a period that depends on the module, the drive current and the ambient temperature. If one laboratory reads after two minutes and another after thirty, their numbers will differ even though both panels behave identically.
Fix a warm-up period in the method and state the pattern shown during warm-up. Driving a full white screen heats the module differently than a mixed interface, so the pattern matters. Record ambient temperature and, where relevant, the panel’s own temperature at the point you can access.
If the measurement is for acceptance rather than characterisation, run the warm-up in the same enclosure and orientation as the final application, because a display in a sealed housing reaches a different equilibrium than a bare module on a bench.
Test patterns for brightness and contrast
Use patterns that isolate the property you are measuring.
- Centre luminance: a white rectangle covering a defined fraction of the screen, with the rest black, so that you measure the bright state without driving the backlight to its maximum load.
- Full-screen luminance: the entire screen white. Useful for worst-case backlight loading and for assessing how much the value drops compared with a partial pattern.
- Contrast: alternate between a full-screen white and a full-screen black state at the same instrument position, keeping the rest of the conditions unchanged.
- Uniformity: a uniform mid-grey or white field across the whole screen, measured at multiple points without moving the display between readings.
Define the grey levels you use. Measuring contrast with a “black” that is actually a low grey will produce a flattering ratio that does not describe the panel’s real dark state.
Sampling points for a uniformity statement
A single centre reading cannot support any claim about uniformity. The common approach is a grid: nine points arranged in a three-by-three pattern, or thirteen points including the midpoints of each edge, measured at fixed distances from the bezel rather than from the active area edge if you want to avoid the border region.
Then decide how to express the result. Reporting maximum divided by minimum tells you the worst case; reporting relative to the centre tells you how the screen behaves relative to what the eye treats as the reference. Both are useful, and neither is complete on its own, so state which convention you used.
For large panels or modules intended for multi-unit installations, consider adding a small number of off-axis points. The corners of a wide panel often behave differently from the centre, and that difference is what viewers notice.
Dark-room and lit-room contrast
Dark-room contrast measures the panel. Lit-room contrast measures the panel plus its environment, and for outdoor or brightly lit applications it is the more meaningful figure.
To measure it usefully, control the illumination rather than describing it. Set a defined illuminance at the panel surface, from a defined direction, and record it. Illumination that arrives at the same angle as the viewer’s line of sight produces the worst reflection; illumination from the side is easier on the panel. Both are worth measuring if the installation has both cases.
This is also where surface treatment shows up. Two modules with identical panel specifications can give very different lit-room contrast because one has an anti-glare surface and the other is glossy. If readability in bright conditions is a requirement, measure it rather than inferring it from a brightness figure.
Choosing the instrument class
Three classes cover most display work.
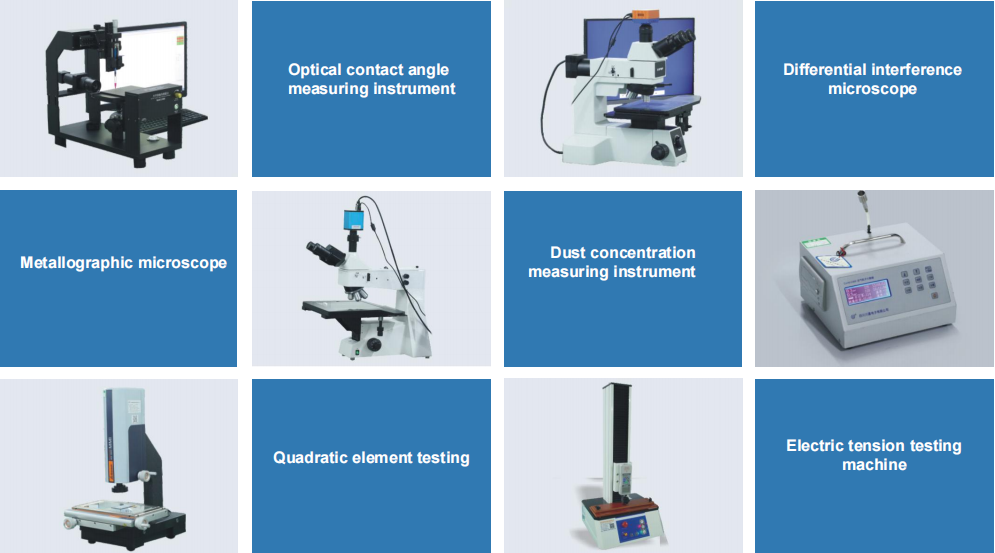
A simple luminance meter measures brightness at a point and is adequate for centre-luminance checks and for monitoring drift over time. A spectroradiometer measures the spectral distribution and is the right tool when colour accuracy, colour temperature or spectral effects matter. An imaging colorimeter captures a whole panel in one frame and produces uniformity maps, which is far more efficient than point-by-point measurement when you need to characterise many units or document defects.
The instrument also needs a calibration status you can cite. A measurement report whose instrument’s calibration has lapsed is not evidence. Record the instrument model, its last calibration date and its calibration source; the quality and certifications page shows the kind of test equipment CDTech publishes as part of its quality documentation, and the same discipline applies to your own lab.

Recording conditions with every number
A measurement record that omits conditions is an anecdote. The following fields are the minimum that makes a result comparable between two laboratories.
| Field | Why it changes the result |
|---|---|
| Pattern used (size, grey level, full-screen or windowed) | Full-screen white loads the backlight and reads lower than a centre window |
| Instrument position and distance | Field of view and angle change the reading |
| Warm-up time and pattern | Luminance drifts before stabilisation |
| Ambient temperature and illumination | Backlight output and dark-state reflection both depend on them |
| Sampling points and reference | Uniformity has no meaning without them |
| Instrument model and calibration date | Determines whether the number is traceable |
| Sample identification and run-in history | A new module and a run-in module can differ measurably |
Errors that make results incomparable
Four mistakes account for most disputes.
Mixing definitions. A “brightness” figure quoted without saying whether it is windowed or full-screen cannot be compared with anything. Ignoring warm-up. Readings taken at different points on the drift curve look like a panel difference that does not exist. Measuring in a different environment. A dark-room contrast figure and a lit-room figure are both correct and not interchangeable. Comparing across units without a lot reference. Unit-to-unit variation within a production lot is real, so a single sample cannot represent a lot; if an acceptance decision matters, agree a sample size and a rule before measurement.
A reusable measurement record
Turn the table above into a one-page record that travels with every sample: sample identifier, pattern, instrument, geometry, warm-up, environment, the values, and the person who measured. Add a field for the acceptance criterion and a tick box for pass or fail, so the record doubles as evidence.
Agree the record format with your supplier before the first sample ships. It costs very little at that stage and removes most of the arguments that otherwise arrive with the first batch. If you are comparing modules for a project and want the measurements to line up with ours, start from the datasheet parameters in how to read an LCD datasheet and use the record above as the shared format.
Frequently asked questions
How long should a display warm up before measurement?
Long enough for luminance to stabilise under the pattern you will measure – commonly twenty to thirty minutes for a module reaching thermal equilibrium, but confirm it by measuring repeatedly until values stop changing.
Should brightness be quoted at the centre or across the whole screen?
Both, labelled. Centre-window values describe the panel’s capability; full-screen values describe behaviour under loading. A single figure without a label is the problem.
Do we need an imaging colorimeter for uniformity?
Not for a one-off check, but it becomes worthwhile when you need to compare many units, document defect patterns, or produce a uniformity map rather than a set of nine numbers.