Optical Bonding for Outdoor Displays: UV, Thermal Cycling and Edge Delamination
Optical bonding outdoors: UV ageing, thermal cycling stress, edge delamination and the qualification programme that predicts field failures.
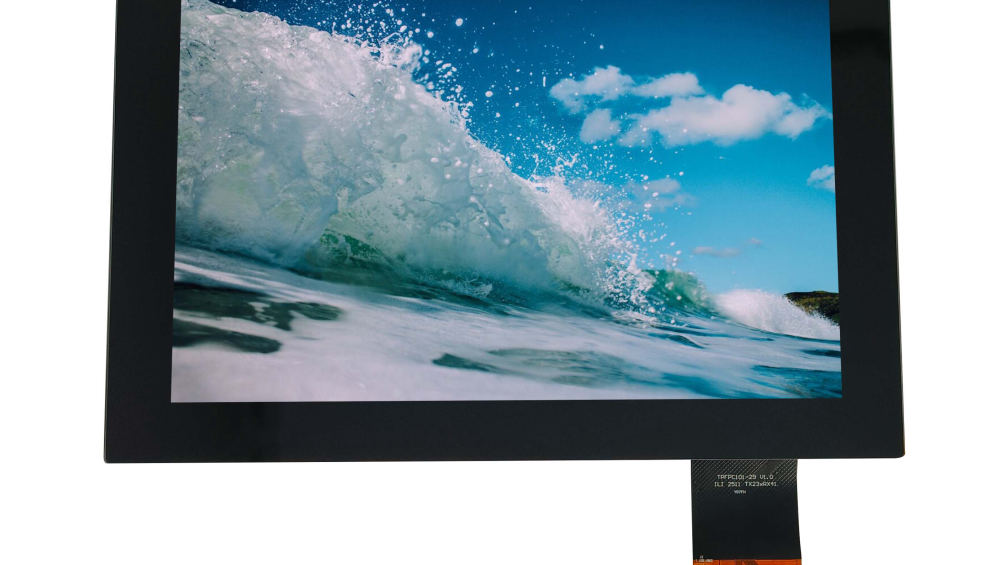
Optical bonding solves contrast and condensation, and in doing so it introduces a large adhesive interface that lives outdoors for a decade. The failures that follow are slow: yellowing at the edges, haze in the centre, lift along a boundary, or a bubble that grows from a particle. They are also predictable, which means a qualification programme can find them years before a customer does.
Part of the Optical, Backlight & Panel Technology guide — 30 articles on bonding, cover glass, brightness and panel choice.
What UV does to a bonded stack
The adhesive and the cover glass print are the exposed materials.
Ultraviolet light passing through the cover glass reaches the adhesive and the polariser behind it. Different adhesive chemistries tolerate UV differently: some yellow measurably, others remain clear but lose adhesion at the edges where oxygen and moisture also act. Printed inks on the glass and coatings on the outer surface also change under UV, and they can shade the adhesive unevenly, producing non-uniform ageing that shows as a pattern matching the print.
The design responses are to select adhesives rated for outdoor exposure, to add a UV-blocking layer in the stack where the application allows, and to keep printed areas away from the optical path where possible. Adhesive suppliers publish UV and weathering data for their product families, and matching that data to the intended exposure is the fastest way to eliminate unsuitable candidates.
The thermal cycle a bonded assembly actually sees
The adhesive expands more than the glass.
Adhesives have a much higher coefficient of thermal expansion than glass, so every temperature change puts shear stress on the adhesive layer, concentrated at the edges where the adhesive meets air. Repeated cycling fatigues the interface, and the failure appears as a fine lift at the border that grows inward. Solar load makes this worse, because the front glass can be much hotter than the rest of the assembly, creating a gradient across the adhesive rather than a uniform expansion.
Qualification should therefore combine thermal cycling with solar simulation or at least with asymmetric heating, rather than running uniform chamber cycles that understate the gradient. Outdoor installations also cycle daily, so a decade is thousands of cycles, not dozens.
Why edge delamination starts at the border
The edge is where moisture, stress and geometry meet.
The bond line at the perimeter is exposed to moisture ingress, to the highest shear stress, and usually to the print step if the border is printed. Any void or weak adhesion there becomes a path for moisture, and once moisture reaches the interface the bond degrades progressively. The design measures are a controlled print step, a defined adhesive thickness at the edge, and where possible a sealing bead or a bezel that protects the bond line from direct water and sunlight.
Inspecting the edge specifically – rather than only the centre of the panel – is what turns a general optical inspection into one that catches delamination early.
Particles, bubbles and their growth
Small defects become large ones through cycling.
A particle trapped during lamination creates a local stress concentration and a void around itself. Under thermal cycling the void can grow as the adhesive deforms around the particle, and under UV the surrounding adhesive may change properties differently from the bulk. The result is a defect that is invisible at shipment and visible after a year outdoors. This is why particle inspection limits matter more for outdoor programmes than for indoor ones, and why the cleanliness of the bonding environment is a commercial issue rather than a housekeeping detail.
Specify particle limits by size and location, and inspect after cycling with the same illumination used for the initial inspection so the comparison is valid.
Design choices that reduce ageing risk
Six decisions carry most of the risk reduction.
- Adhesive chemistry qualified for UV and thermal cycling, not only for optical performance.
- Adhesive thickness range that accommodates the print step without thinning at the edge.
- Print layout that keeps the step away from the critical optical boundary.
- Bezel or frame geometry that shades and protects the bond line.
- Cover glass coating that reduces UV transmission where the application permits.
- Thermal path that reduces the temperature difference across the assembly.
Each of these is cheaper to implement before tooling than after a field campaign, and most of them are drawing decisions rather than process innovations.
Qualification programme for outdoor bonding
Run the sequence, not the individual tests.
- Initial inspection: optical measurements and a documented defect map.
- UV exposure at a defined dose, with the glass and coating in place.
- Thermal cycling with asymmetric heating to create a gradient.
- Humidity exposure combined with cycling, to drive the edge interface.
- Re-measurement: haze, transmission, luminance uniformity and edge inspection.
- Sectioning of a sample to examine the bond line where inspection cannot see.
The value of the programme is in the comparison between the initial and final states on the same units. CDTech’s materials on OCA and OCR bonding, on inspecting bonding quality and on bonded versus air-gap construction cover the process and inspection side.
Choosing between bonding and a protected air gap
Bonding is not always the right answer outdoors.
A bonded assembly delivers better contrast, eliminates internal fogging and improves touch coupling, at the cost of a large adhesive interface that ages. An air gap with a properly vented and desiccated enclosure avoids the adhesive ageing question but reintroduces internal reflections and condensation risk, and it is harder to make touch work through. For very long-life outdoor installations with modest optical requirements, the air-gap route with a well-designed enclosure can be the more predictable choice.
The decision should follow the failure modes that the specific installation is most exposed to: condensation in a humid climate, UV in a sunny one, and thermal cycling where the assembly sees large daily swings.
What to specify in the purchase drawing
Make the ageing-relevant parameters explicit.
| Item | Specify |
|---|---|
| Adhesive | Chemistry, UV rating, temperature range, supplier and grade |
| Adhesive thickness | Nominal value with tolerance, and the minimum at the print edge |
| Edge treatment | Bezel protection, sealing bead if used, edge inspection criterion |
| Ink type, thickness, distance from the optical boundary | |
| Glass | UV transmission, coating, thickness |
| Defect limits | Particle size and count by zone, bubble limits, edge lift limits |
| Qualification | UV dose, cycling profile, humidity sequence, re-measurement method |
| Change control | Notification before any adhesive, ink, glass or process change |
Adhesive and material data for these choices is published by suppliers such as DELO and Henkel, and substrate properties by glass suppliers such as AGC. Where the assembly is installed in a sealed outdoor enclosure, the relevant ingress definitions are in IEC 60529.
FAQ
How long does optical bonding last outdoors?
It depends on the adhesive chemistry, the UV dose and the thermal cycling the assembly sees. Adhesives qualified for outdoor exposure with a protected bond line can last many years, while an unqualified adhesive in a high-UV installation can show edge lift or yellowing within a few seasons. Qualification testing on production materials is the only reliable predictor.
Why does bonded glass delaminate at the edges?
The perimeter sees the highest shear stress from differential expansion, the most moisture and often the print step. Voids or weak adhesion there become paths for moisture, and the bond degrades progressively. Bezel protection, controlled print steps and edge inspection are the practical countermeasures.
Does UV damage the adhesive or the display?
Both are affected, but the adhesive and the outer coatings degrade first because they are directly exposed through the glass. Yellowing reduces transmission and changes colour; print ink can fade and shade the adhesive unevenly. A UV-blocking layer in the stack reduces the dose reaching the adhesive.
Is bonding always better than an air gap outdoors?
Bonding gives better contrast, removes internal fogging and improves touch coupling, but adds an adhesive interface that ages. In very long-life installations with modest optical requirements, a well-designed vented enclosure with an air gap can be the more predictable choice. The decision should follow the dominant failure risk at the site.
Next step
Send the installation climate, solar exposure, thermal range and expected service life to CDTech; the reply will propose an adhesive and stack configuration with the qualification programme that supports it.
Contact sales@cdtech-lcd.com or use the contact page.
Related articles
 Backlight Driving and Dimming: PWM, DC and Hybrid Approaches ComparedOptical, Backlight & Panel TechnologyBacklight Lifetime and Lumen Maintenance: Predicting Real Service LifeOptical, Backlight & Panel Technology
 Mura, Uniformity and Optical Acceptance: Writing a Standard Both Sides Can EnforceOptical, Backlight & Panel Technology
 Anti-Glare and Anti-Reflective Coatings: Durability Under Real Cleaning and AbrasionOptical, Backlight & Panel Technology