Digital Cockpit Displays: Specifying a Multi-Screen Architecture Without Reliability Surprises
Digital cockpit display architecture: multi-screen optical needs, night dimming, curved bonding tolerances, thermal load, SerDes links and hidden cost drivers.
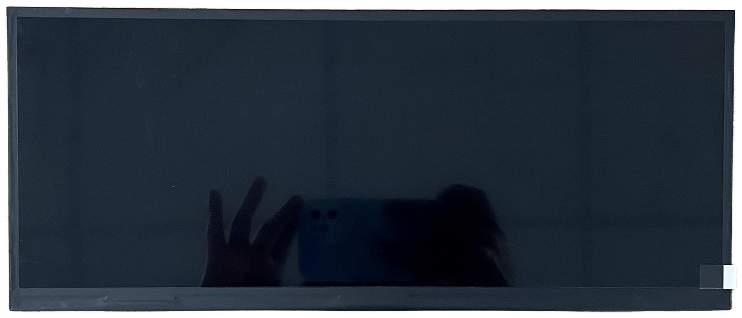
Digital Cockpit Displays: Specifying a Multi-Screen Architecture Without Reliability Surprises
A cockpit programme with three screens is not three times the work of one; it is a different class of programme. The screens share a dashboard volume, a thermal budget, a dimming curve and often a single SoC that changes twice before SOP. The reliability surprises come from those shared constraints, and they are cheapest to fix in the specification, before tooling is paid for.
Which displays belong to a modern cockpit, and which are converging?
Cluster, centre stack and passenger screens converge physically, not optically.
The classic layout separated instrument cluster, centre information display, passenger display, head-up projection and mirror or camera-monitor screens. The current direction merges the cluster and centre stack into one continuous glass surface with distinct functional zones, which reduces mechanical parts but makes the optical specification harder: one bonded assembly now has to satisfy the viewing angles and brightness needs of a driver-side instrument area and a centre touch area at the same time.
Before writing a module specification, decide which surfaces are genuinely one part and which are separate assemblies that only look continuous. A single bonded panel across 800 mm changes tooling, yield, service strategy and replacement cost; two panels behind a shared cover glass keeps the optical result and keeps serviceability. CDTech supplies automotive TFT modules and bonded assemblies across both approaches, so this decision can be made on programme constraints rather than on a factory’s preferred process.
Cluster, centre stack and passenger display: different optical requirements
Each zone needs its own brightness and coating decision.
An instrument cluster is read at a glance in a dark cabin and in direct sunlight through the windscreen, so it needs a wide dimming range at the low end and enough peak brightness with anti-glare treatment at the high end. A centre stack display is touched, so it carries a cover glass with an anti-fingerprint treatment, and it is usually the surface most exposed to cleaning chemicals. A passenger display competes with the same sunlight but is viewed at an angle, so its viewing-angle behaviour and bonding quality matter more than its peak brightness.
Specifying one coating for all three zones is the most common cost-saving decision that turns into a complaint: an anti-glare surface that suits the cluster softens the centre stack image, and an anti-reflective coating tuned for the passenger screen is wasted on a display nobody touches. CDTech applies AG, AR and AF treatments and can combine them per zone within one programme.
Night dimming and the low-luminance problem
Low-end dimming is a system property, not a display property.
Cockpit displays must dim far below their maximum to avoid glare at night, and the floor of that range is set by the panel, the backlight driver and the host’s dimming method together. A display whose backlight driver only supports coarse pulse-width modulation will flicker or step visibly in the low range; a DC or hybrid dimming approach with a wider control range holds a smooth low end. The requirement should be written as a luminance floor with a flicker limit and a dimming curve, not as a percentage of maximum.
The second constraint is ambient adaptation. The cluster, centre stack and passenger screens must dim consistently; if one dims faster or further than the others, the cabin looks broken even when every screen is individually within specification. Specify a shared dimming curve or a synchronised ambient-light strategy, and validate it at night in a real vehicle rather than in a test chamber with a lux meter.
Free-form and curved bonding: where tolerances break first
Curvature tolerance, not bonding technology, decides yield.
Bonding a flat display behind curved cover glass works when the curvature is gentle and the adhesive thickness can absorb the difference. As radius decreases, the adhesive has to compensate more, the optical path shortens at the edges, and the risk of bubbles, edge lift and mura rises. The practical limit is set by the cover glass forming process and by how much adhesive thickness variation the optical stack can tolerate before it is visible.
Write the curvature specification with a radius tolerance and a glass thickness tolerance, and require the supplier to state the adhesive thickness range in the assembly drawing. CDTech’s optical bonding work covers OCA and OCR processes, and the choice between them changes both the tolerance budget and the rework options. For a curved, multi-zone assembly, plan for an optical inspection criterion that is measurable – haze, edge lift and luminance uniformity limits – rather than a verbal standard.
Thermal load inside a sealed, sun-soaked dashboard
A sealed dashboard reaches temperatures the climate record never shows.
Solar load through the windscreen plus backlight heat plus a sealed volume produces internal temperatures far above ambient, and the display sits at the top of that volume where the heat collects. The backlight is usually the largest heat source in the module, so brightness and thermal margin trade directly against each other: a brighter display in the same volume runs hotter and shortens its own life unless the thermal path is designed with it.
Specify the internal air temperature at the display surface for the worst case, then require a thermal simulation or a chamber test with the display at full brightness in that condition. CDTech’s reliability work covers thermal shock and aging tests on display modules, and those results are only meaningful if the test profile matches the dashboard condition rather than a generic automotive default.
SerDes, LVDS and eDP trade-offs across three screens
Pick the link by distance, bandwidth and shared host ports.
Short runs inside one housing are comfortably served by LVDS, which remains inexpensive and well understood. DisplayPort-based links earn their cost when bandwidth requirements rise, when cable runs reach across the vehicle, or when several displays share one host output. Serialiser-deserialiser links over coax or shielded twisted pair solve the long-run and EMC problems, and with power-over-coax they also remove a separate power feed to the screen.
The trade is architecture, not just silicon: a SerDes link concentrates cost in the host and in each remote node, while parallel approaches spread cost across more conductors and more connectors. TI’s FPD-Link devices and the MIPI DSI specification document the two families most cockpit programmes evaluate. Decide the topology before the display interfaces are frozen, because reversing it later invalidates connector, harness and PCB work.
Touch sensing through curved cover glass: linearity at the edges
Edge linearity is where curved touch specifications fail.
A capacitive sensor bonded behind curved glass sees a slightly different coupling at the edges than at the centre, and the difference grows with curvature and glass thickness. The symptom is a touch that works everywhere except the outer 10 mm, which is exactly where carmakers place climate and menu controls. The fix is a sensor design and controller tuning matched to the actual glass geometry, validated with a grid test on production-intent samples.
Add two conditions to the touch specification that cockpit programmes often omit: glove operation and water droplets from a wet umbrella or a spilled drink. Both reduce signal margin, and the combination of curvature, thick glass and gloves is the hardest case a cockpit touch stack will face in service. CDTech’s PCAP versus resistive comparison for in-vehicle HMI covers the sensor-level trade-offs.
How to phase display development when the SoC changes twice a year
Freeze the optical and mechanical stack, not the electronics.
SoC and graphics platforms change faster than glass, bonding and mechanics can be re-tooled. The workable strategy is to freeze the optical stack – panel size, resolution class, cover glass, bonding method, mechanical envelope – and keep the interface and timing controller in a changeable layer. A display with an integrated timing controller and a standard input can survive a processor change with a firmware update; a display wired directly to a processor’s parallel bus usually cannot.
CDTech’s approach to automotive programmes includes evaluation drawings and design consultation before tooling, which is the point at which the changeable and frozen layers should be separated explicitly. Document which parts of the specification a platform change is allowed to touch. That single paragraph prevents a revalidation from turning into a re-tooling.
Cost drivers buyers underestimate in multi-screen cockpits
Yield, bonding and validation dominate the unit price.
The visible cost drivers are the panel, the touch sensor and the cover glass. The ones that move a programme budget are bonding yield on large or curved assemblies, the number of distinct part numbers created by giving each screen its own coating and brightness, the tooling needed for each cover glass shape, and the validation cost multiplied across variants. A three-screen cockpit with four part numbers carries far more fixed cost than one with two.
Two decisions reduce it without reducing quality: standardise the panel and interface across zones and vary only the cover glass and coating, and keep the number of distinctly validated assemblies as low as the vehicle architecture allows. Both are easier to make with a supplier that builds display, touch and bonding under one roof, because the trade-offs are visible in one quotation rather than spread across three vendors. The OCA versus OCR bonding comparison on CDTech’s technical blog covers the process differences behind bonding cost.
Specification checklist before the first tooling payment
Confirm these nine items in writing before tooling is released, because each one is expensive to change afterwards.
- Zone map: which surfaces are one part, which are separate, and how the boundary is disguised.
- Optical targets per zone: peak luminance, luminance floor with flicker limit, and coating choice.
- Curvature and its tolerance, with adhesive thickness range stated in the drawing.
- Thermal case: internal air temperature at the display surface, at full brightness, worst case.
- Interface and topology, with the cable route and connector positions shown.
- Touch requirements including glove and water conditions, and edge linearity limits.
- Dimming strategy, shared curve and ambient adaptation behaviour across screens.
- Validation plan: thermal cycling, sunlight load, vibration, optical inspection criteria.
- Change-control boundary: what a platform change may alter without re-tooling.
Programmes that write these down early spend their budget on engineering; programmes that leave them implicit spend it on re-tooling. The automotive industry’s own quality framework, maintained by the International Automotive Task Force, exists precisely because late changes are the most expensive ones. Test methods for the validation plan are usually drawn from the SAE standards programme, and industry coverage of cockpit electronics trends is available through Semiconductor Engineering.
FAQ
How many displays are in a modern digital cockpit?
Typically three to five addressable surfaces: instrument cluster, centre information display, passenger display, plus head-up projection and mirror-replacement screens. Several of them are often served by one physical glass assembly with distinct zones, so the count of displays and the count of assemblies are not the same number.
Can one bonded panel cover both the cluster and the centre stack?
Yes, and it is common, but it forces a single optical and thermal specification onto two zones with different needs. The alternative is two panels behind a shared cover glass, which keeps zone-specific optics and serviceability at the cost of an additional module and a visible seam if the gap is not designed out.
Why do cockpit screens flicker at night even when the brightness is correct?
Low-end dimming is usually implemented as pulse-width modulation, and at very low duty cycles the modulation becomes visible as flicker. A wider dimming control range, DC dimming or a hybrid approach keeps the low end smooth; the requirement should be written as a luminance floor with a flicker limit rather than as a percentage of maximum brightness.
What curvature is realistic for a bonded automotive display?
Gentle curvature on a large radius is routinely achievable, while tight radii push adhesive thickness variation and edge stress to the limit of what can be inspected reliably. The practical answer comes from the cover glass forming process and the supplier’s stated adhesive thickness range, validated by an optical inspection criterion on production-intent samples.
Next step
If a multi-screen cockpit is at the specification stage, send the zone map, envelope and thermal case to CDTech for an evaluation drawing that shows the display, touch, bonding and interface stack per zone.
Write to sales@cdtech-lcd.com or use the contact page; the automotive programme and qualification scope is summarised under quality certifications.
Related articles
 Sunlight-Readable Industrial Displays: How to Hit the Numbers in Real Ambient LightInfo
 Choosing an Industrial HMI Display for a Machine That Must Run 24/7 for Ten YearsInfo
 OLED Versus LCD for Industrial HMI: Lifetime, Burn-In and FitInfoDisplay Timing Parameters Explained: Pixel Clock, Blanking and Sync for PractitionersInfo